2/3rd Australian Pioneer Battalion
From Our Contribution
Contents
Brief History
The 2/3rd Australian Pioneer Battalion was raised in May 1940 at Glenfield, New South Wales. The battalion did its initial training at Glenfield, before moving to Cowra in September for further training. In March 1941 the 2/3rd moved to Darwin, where it became attached to elements of the 7th Australian Infantry Division. In September the pioneers returned to Sydney and in November left Sydney as part of a convey going to the Middle East. The 2/3rd sailed on HMT Queen Mary, the same ship that brought them home 14 months later.
The battalion arrived in Egypt in the third week of November and travelled by train to Qastina in Palestine. In January 1942 the 2/3rd moved to Syria, and became attached to the 9th Australian Infantry Division. The 2/3rd fought alongside the 9th Division for the rest of the war.
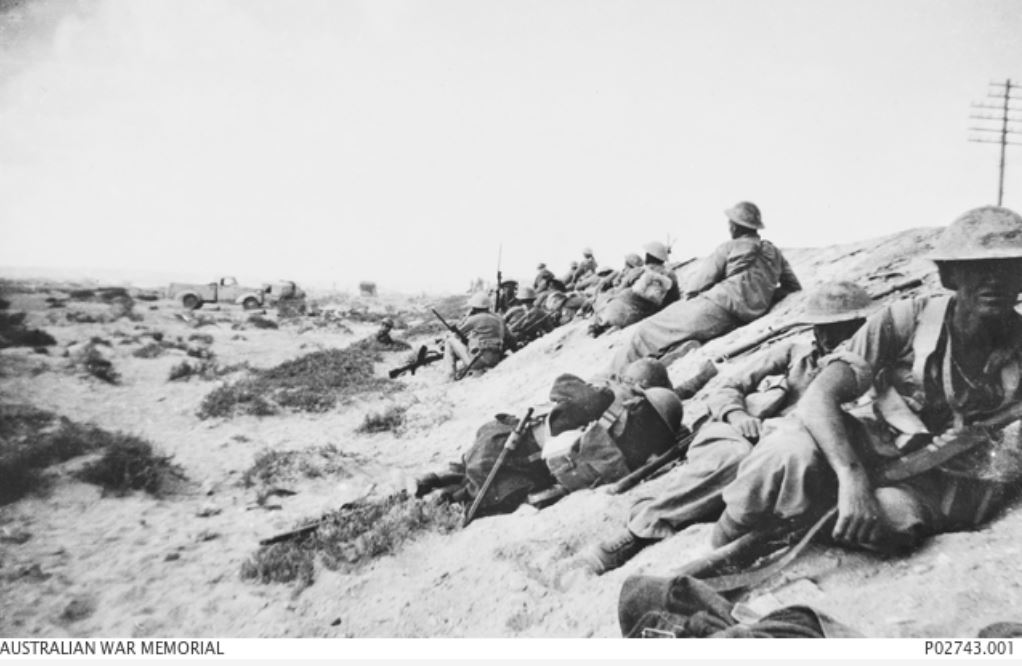
By July 1942 German and Italian forces had reached El Alamein in Egypt, about seventy miles from Alexandria. The 9th Division was rushed from Syria to the Alamein area and held the northern sector for almost four months as the Eighth Army reinforced for an offensive. The 2/3rd moved to Bir Abu Shinena, part of the "Alamein box", at the start of August and became attached to the 24th Australian Infantry Brigade. The pioneers replaced the 2/28th Australian Infantry Battalion, which had suffered heavy casualties, and went into reserve. They helped defend the area and improve the defences before the Allied counter-attack in October.
The battalion played a prominent role in the heavy fighting around areas known as the "Saucer" and the "Blockhouse". The 2/3rd Pioneers were directed to attack 3,000 yards directly north from the Saucer and to take up a blocking position in the dunes near the coast. In the early hours of 30 Oct 1942 the pioneers had travelled only halfway when they were blocked by supporting artillery bombardment. Forced to leave their heavy weapons and ammunition behind in trucks, the pioneers continued on. At the break of dawn, however, they found themselves in another saucer, subject to enemy fire from three sides. But they had achieved their goal and virtually sealed-off the enemy in the coastal salient. For the next two days the Australians defended their exposed positions. Many of their front positions were either captured or ground down by repeated German attacks. In the main Saucer, however, the Germans had less success, even though the eastern part of the Australian defence was pushed back south of the railway line. Fighting continued for the next couple of days and German forces were worn down. By 5 November Axis forces were falling back. Between August and November 1942 the battalion suffered 28 men killed and 46 captured. The 9th Division was then recalled to Australia to face the Japanese. The 2/3rd returned to Australia in early 1943 aboard HMT Queen Mary.
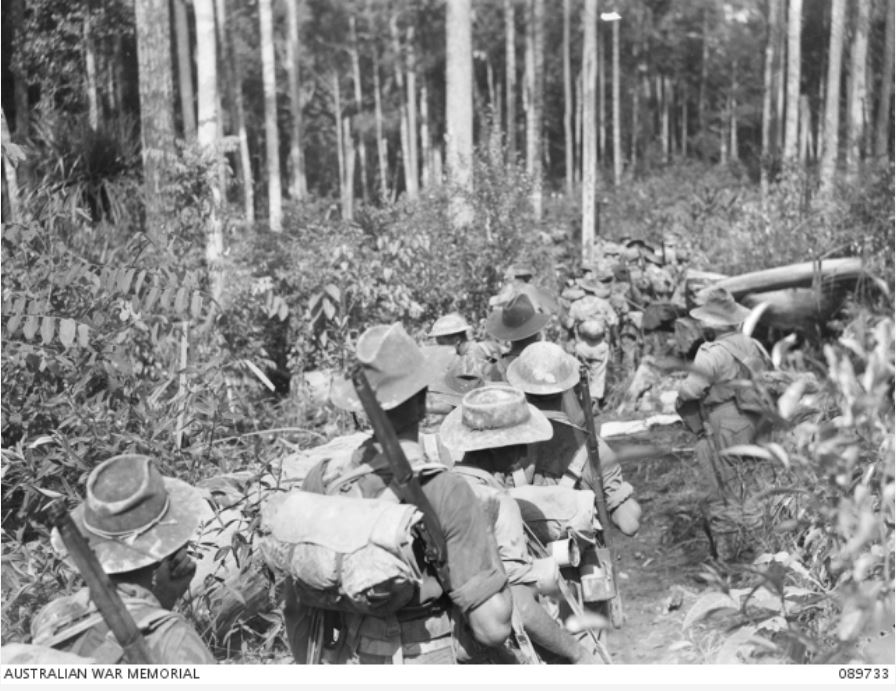
After leave, the battalion underwent jungle training on the Atherton Tablelands in Queensland. In September as part of the attack on the Japanese base at Lae the 9th Division landed at Red Beach, north-west of Lae. Following its capture, another landing was made at Scarlet Beach, near Finschhafen. The 2/3rd rejoined the division and in October participated in the successful defence of Scarlet Beach when the Japanese counter-attacked. When the fighting was over, the pioneer's reverted to their engineering role, working on the Sattelberg Road and other locations in support of the Huon Peninsula campaign.
Returning to Australia in March 1944, they disembarked in Brisbane. After leave, they reformed at Ravenshoe (Qld) in May and did not go into action again until the final months of the war when as part of the 9th Australian Infantry Division they landed on Tarakan in May and on Labuan Island and Brunei Bay in June.
In order to support the landing at Tarakan, Australian troops first landed on Sadau. A detachment from the 2/3rd worked as gun crews on the landing craft that took the men ashore. When the 26th Brigade landed on Tarakan, the pioneers were assigned to the 2nd Beach Group. On 4 May 1945 the battalion relieved the 2/23rd Australian Infantry Battalion and began patrolling the Tarakan township and around the Pamoesian oilfield. The next day they began clearing the Japanese from high ground to the east of the town.
On 5 May two companies from the 2/3rd advanced eastward along John's Track and found two Japanese positions - called the "Helen" and the "Sadie" - on each side. The positions were overcome with persistent attacks from the pioneers supported by heavy artillery, naval bombardment, and air strikes. They were finally occupied on 14 May. At the same time elements of the pioneers reached the coast and captured the Japanese defences. Corporal John Bernard Mackey was posthumously awarded the Victoria Cross for his involvement in the fight for the Helen.
By the end of June the fighting was over on Tarakan and Japan surrendered in August. The 2/3rd Battalion gradually thinned, as men were discharged or transferred. In January 1946 the remaining troops returned to Australia and the battalion was disbanded shortly after. 98 men died while posted to this unit and 41 were made POW in North Africa.
Battalion Personnel
- Arthur Lloyd Brockwell 5 Jul 1944 - 29 Sep 1945
- Arthur Donald Free 25 Oct - 10 Dec 1945
Battle Honours
- North Africa 1942
- South Wes pacific 1943-45
- El Alamein
- Capture of Lae
- Defence of Scarlet Beach
- Siki Cove
- Finschhafen
- Borneo
- Tarakan
Individual Honours
- 1 x Victoria Cross
- 2 x Military Cross
- 1 x Distinguished Conduct Medal
- 5 x Military Medal
- 22 x Mentioned in Despatches
Notes
Content has come from the Australian War Memorial web site [1]

